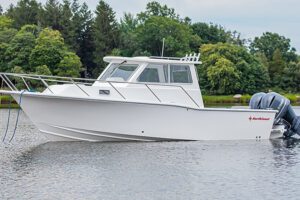
As the fall weather rolls in, it’s hard to imagine you’ll have to start thinking about winterizing your boat in the coming months. Winterizing your boat properly will make for a smooth launch come spring. Whether you decide to hire someone to winterize your boat or to do it yourself, here are helpful resources and winterization tips.
Schedule Your Winterization Service
At our Pocket Yacht Service Facility in Chester, Maryland, we offer winterization and storage services for our Ranger Tug and Cutwater owners. To find pricing and get an estimate for your winterization work please download our fillable PDF linked below and send it to service@pocket-yacht.com.
To download our Fillable Winterization PDF: Click Here
Once you’ve filled out the form and sent it to service@pocket-yacht.com, our awesome Service Administrator, Tiffany Constantino will be happy to promptly send you an estimate and get your works scheduled right away.
—-
If you decide to DIY here are
Winterization Tips from the Ranger Tug Factory
The Ranger Tug Factory has a fantastic how-to series called “As the Prop Turns”… you may have heard of it.
Below you’ll find the Winterization Tips video and tips right from RangerTugs.com.
“The following systems should be winterized before freezing weather sets in. Some Ranger Tugs models may not have all the following components:
Winterizing the Potable Water System
To empty the potable water system, we use a tool developed at our factories consisting of an air compressor with a pressure regulator set to a maximum of 20 PSI, along with a quarter turn air valve and quad-port connection to the potable water pump. Similar tools can be purchased online.
Turn on the water pump breaker.
Open faucets to drain the potable water tank.
Open the drain on the hot water heater and drain water from hot water heater. Shut once drained.
Once the tank is drained, disconnect the strainer from the potable water pump.
With the air valve closed, connect the air compressor to the potable water pump (also checking the device’s pressure regulator is set to no more than 20 PSI).
Open the air valve on the air compressor and open each faucet one at a time (including outdoor faucets), ensuring all hot and cold water has been cleared.
Once all faucets are cleared, open the hot water tank drain valve to blow out any remaining water.
Winterizing the Shower Sump
After emptying the potable water system with compressed air, pour pink RV antifreeze into shower drain until the pump begins to discharge overboard. Use a spotter to ensure discharge. If you have multiple showers onboard (including outdoor showers), this procedure should be repeated for each shower drain.
Winterizing the Head and Holding Tank
Seawater Head:
Ensure your blackwater tank is clean and flushed thoroughly. If your boat remains in the water, shut the thru-hull and flush the toilet several times to empty the lines first.
Close the raw water seacock.
Remove strainer cap and fill strainer with RV antifreeze.
Operate toilet(s) until pink antifreeze appears in the toilet bowl. Flush several cycles to ensure lines and holding tank receive antifreeze.
If the boat is equipped with a macerator, run momentarily until pink RV antifreeze is evacuated.
Freshwater Head – R-31 Only:
Ensure your blackwater tank is clean and flushed thoroughly.
Turn on potable water pump breaker and flush the toilets several times to clear the remaining water. With the air connected at the freshwater pump, flush the toilet and the air will push the remaining water through.
Once water is no longer flowing into the toilet bowl when flushing, pour pink RV antifreeze directly into the bowl and flush several times.
If the boat is equipped with a macerator, run momentarily until pink RV antifreeze is evacuated.
Winterizing the Washdown System
Close the raw water seacock.
Remove strainer cap and fill the strainer with RV antifreeze.
Turn on the washdown pump switch and allow it to pump until antifreeze shows at the spigot.
Winterizing Inboard Engines
Close the raw water seacock.
Flush motor with fresh water for 5-10 minutes by putting a hose to the sea strainer.
Open 3-4 gallon containers of RV antifreeze to have ready to pour into the engine sea strainer.
Pour RV antifreeze into the engine sea strainer as your helper starts the engine.
Run the engine until antifreeze starts coming out your engine exhaust overboard discharge (use a spotter to check).
Winterizing Outboard Engines
Remove shock absorbers and tilt the motor(s) all the way down.
Unscrew the flush port connector and connect a water hose (make sure not to loosen or drop the gasket in the connector), turn on fresh water and allow to flush for 5-10 minutes. Water will flow from the exhaust and pilot water outlet.
After flushing, re-screw the flush port.
If the boat is left in the water, Yamaha recommends leaving the engine down to ensure complete drainage throughout the cold period.
Winterizing Bilge Pumps
Ensure keel drain plug is installed.
Remove both auto bilge pump fuses at battery switch panel. Don’t forget about the bilge in the pod on the R-23 & R-43.
Pour 2 gallons of antifreeze into the bilge and run the bilge pumps until antifreeze is showing at the overboard thru-hulls.
Winterizing the Fishbox and Livewell
If your boat is equipped with a fish box, chances are there will be a macerator pump used to drain the box. Pour pink RV antifreeze in the box and turn the macerator on until pink comes out of the discharge drain.
If your boat is equipped with a livewell, it is most likely hooked into the raw water washdown pump. Follow the procedure for the raw water washdown pump, opening the proper valves to the livewell and make sure pink comes out to fill the livewell.
Winterizing Generator and AC
If winterizing a boat equipped with generators and air conditioning, the steps can vary depending on the type of seawater strainer. However, the end goal remains the same:
Close the seacock.
Locate the appropriate strainer and remove the cap.
Fill with pink RV antifreeze while running system.
Fill and run system until pink RV antifreeze is expelled from appropriate thru-hull.
Winter Storage Prep (Without Power)
If storing out of the water, remove batteries with full charge or remove all hot fuses (put in a bag and tape to the steering wheel so they’re noticed again). You can also remove the groundings from each battery, but be sure to take photos and label beforehand for reattachment.
Use DryAir (bag style) dehumidifiers (2+, distributed throughout the boat).
Open cabinets and floor hatches.
Leave the head door open.
Draw curtains and put canvas on (even on trailer).
Winter Storage Prep (With Power)
Ensure shore power and battery charger are plugged in and turned on.
Use “electric pancake” marine dehumidifiers and ceramic heaters (safe for use on boats).
Open cabinets and floor hatches.
Leave the head door open.
Draw curtains and put canvas on (even on trailer).
Additional Winterizing Tips
Any system that is above the waterline and outside of the salon will need to be winterized, including outdoor sinks and showers, raw water washdowns, and icemakers.
Defrost fridges, freezers, icemakers, and wine coolers by placing a towel at the base of the appliance, then turn off and allow to thaw. Leave the door cracked open.
Drain the potable water system to prevent foul taste & odors, and treat the holding tank.
Perform engine service before winterizing.
Download our printable Winterizing Checklist at the link below.
”
Content courtesy of RangerTugs.com